
Mushroom Foraging for Beginners: Safety Rules, Tools, and Lookalikes
Most mushrooms you pass on a trail are harmless. A few are excellent eating. A small number can send you to a hospital, and a handful can kill. That gap is the entire reason foraging has rules, and why the rules come before the recipes.
The good part: you can learn the rules on walks where you never pick a thing. Spend your first season identifying, photographing, and leaving mushrooms where they sit. The basket can wait.
Start With the Rules, Not the Mushrooms
- Never eat anything you cannot identify to species with certainty. "Probably" and "it looks like" are not identifications. If you have any doubt at all, it goes back in the woods.
- Learn the deadly species before the edible ones. You cannot avoid what you cannot recognize. Study the amanitas, the deadly galerina, and the false morels first.
- Check every single specimen in the basket. One wrong mushroom mixed into a good batch spoils the whole meal. Lay everything out and go through it piece by piece before cooking.
- Use several features, never one. Cap color alone tells you nothing. You need shape, gills or pores, stem, base, habitat, smell, and a spore print.
- Skip the little brown mushrooms. The small, brown, unremarkable ones are the hardest group to sort out and include seriously toxic species. Even experienced foragers mostly leave them alone.
- Cook everything thoroughly. Some mushrooms are toxic raw and fine cooked. Nothing you find in the woods should go into a salad.
- Try one new species at a time, in a small amount. Eat a modest portion, keep a raw specimen in the fridge, and wait a day before eating more. Never serve a mushroom you have not eaten yourself to guests, children, or anyone with a health condition.
Two more habits worth building. Skip alcohol on any day you eat a mushroom you are trying for the first time, since a few species interact badly with it. And avoid picking near roadsides, sprayed lawns, golf courses, or old industrial ground, where mushrooms can concentrate pollutants from the soil.
What to Carry
You need very little, and none of it is expensive.
- An open basket or mesh bag. Mushrooms need air. A plastic bag turns them to slime and crushes the features you need for identification.
- A sharp folding knife or curved mushroom knife. For clean cuts and for trimming dirt in the field.
- A soft brush. A pastry brush works. Clean mushrooms keep better and are easier to examine.
- Waxed paper or paper sandwich bags. Use them to keep different species separate so spores and fragments do not mix.
- A hand lens. Ten times magnification reveals details on gills and caps that your eyes miss.
- A regional field guide, plus a second source. A local guide beats a national one. Two references catch each other's errors.
- A notebook and pencil. Record the date, location, nearby trees, and what the mushroom was growing on. Those notes are how you actually learn.
- Water, a charged phone with a map, and a whistle. Mushroom hunting pulls you off trail and makes you look down instead of around.
A note on identification apps
Phone apps are useful for a first guess and for logging what you saw. They are not a safety check. Treat every app suggestion as a lead to verify in a book or with a person who knows your region.
How to Identify a Mushroom You Plan to Eat
Work through the whole specimen, not just the pretty top. Dig or cut it free at the base, because the base is where the most important features often hide.
Look at the cap shape and texture. Turn it over and check what is underneath: true gills, blunt ridges, pores, or teeth. Note whether the gills attach to the stem or run down it. Examine the stem for a ring, and the base for a cup-like sack called a volva. Split the mushroom lengthwise to see whether it is hollow or stuffed. Then make a spore print by setting the cap gills-down on white and dark paper overnight; spore color, white versus rusty brown versus pink, eliminates whole groups at once.
Finally, note the setting. Some species grow only on wood, others only from soil, and many grow only alongside particular trees. Habitat is evidence.
Lookalikes That Catch Beginners
Puffball and young amanita
A white puffball is easy to love: no gills, no stem, solid and marshmallow-like inside. The problem is that a young amanita still wrapped in its egg-like volva looks similar from above. The fix is simple and non-negotiable. Cut every puffball in half top to bottom. A true puffball is uniform white inside. An amanita shows the outline of a cap, gills, and stem forming in the middle.
Chanterelle and jack-o'-lantern
Chanterelles have blunt, forking ridges rather than sharp gills, a fruity smell, and usually grow from soil in ones and twos. Jack-o'-lantern mushrooms grow in dense clusters on wood or buried roots, have sharp true gills, and cause violent stomach upset. If the mushroom is in a big clump on wood, walk away.
Morel and false morel
A real morel has a honeycomb cap of pits and ridges, and it is hollow from the tip of the cap straight through the stem. False morels look brain-like or lobed, often with a cottony or chambered interior, and are linked to serious poisonings. Cut every morel lengthwise before it goes in the basket.
Field mushroom and destroying angel
Meadow mushrooms and their relatives have pink gills when young that darken to chocolate brown, and no volva. The destroying angels and death caps have white or pale gills, a ring on the stem, and a volva at the base. Dig the base out. If there is a sack around it, leave it.
Honey mushroom and deadly galerina
Deadly galerina grows in clusters on decaying wood and looks convincingly like a honey mushroom. The spore print separates them: white for honey mushrooms, rusty brown for galerina. When in doubt, take the print.
If Someone Eats the Wrong Thing
Treat any vomiting, cramps, or diarrhea after a mushroom meal as an emergency. Contact your local poison control center or emergency services right away, and do not wait for symptoms to pass on their own. Some of the most dangerous species cause symptoms that appear many hours late, and there can be a deceptive stretch where the person seems to recover before things get worse.
Keep the raw leftovers, trimmings, or a clear photo of the mushrooms, and bring them with you. It helps clinicians enormously. For anything involving a child, a pregnancy, or an existing health condition, get professional medical advice immediately rather than watching at home.
Your First Season
Pick one or two easy, distinctive species that grow where you live and learn them cold. Take a spore print every time. Photograph the cap, the underside, the stem, and the base before you pick anything at all. Join a local mycological club if there is one near you; a single walk with people who know your woods is worth a dozen field guides.
Check the rules where you plan to forage, too. Many parks and protected areas prohibit collecting, and private land requires permission. Then keep your expectations small and your curiosity large. Learning to see what is actually in front of you is the real skill, and it takes a season or two to build.
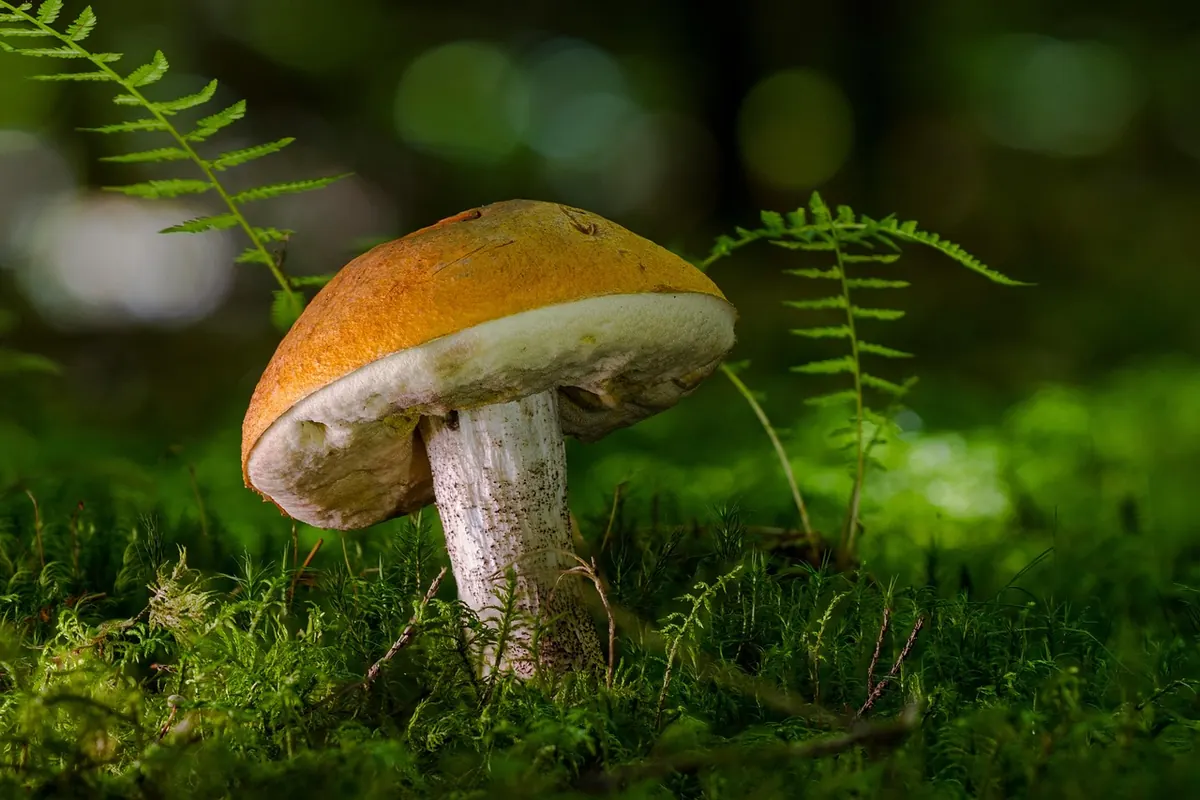
Photo: adege / Pixabay